
Category Archives: Blog

7 Best Water Garden & Outdoor Pond Accessories 7 Best Water Garden & Outdoor Pond Accessories

7 Best Water Garden & Outdoor Pond Accessories

Building your outdoor water pond is only the first step to living the water feature lifestyle. You’ll also need to fill it up with accessories to stand out. From aquatic plants to spitters, here are seven great ideas to accessorize your water garden!

Add A Walkway

Adding stepping stones to your outdoor water pond enables a more immersive experience. Instead of just watching the water from the sides, you can walk over it and see it at different angles. Plus, it encourages everyone to explore your garden.

Illuminate Its Surroundings

Make the most of your garden pond with lighting! Accessories like lanterns, festoons, and spotlights will dance across the water, letting you admire it even at night. Solar-powered LED fountains also light up with a kaleidoscope of colors.

Install A Waterfall

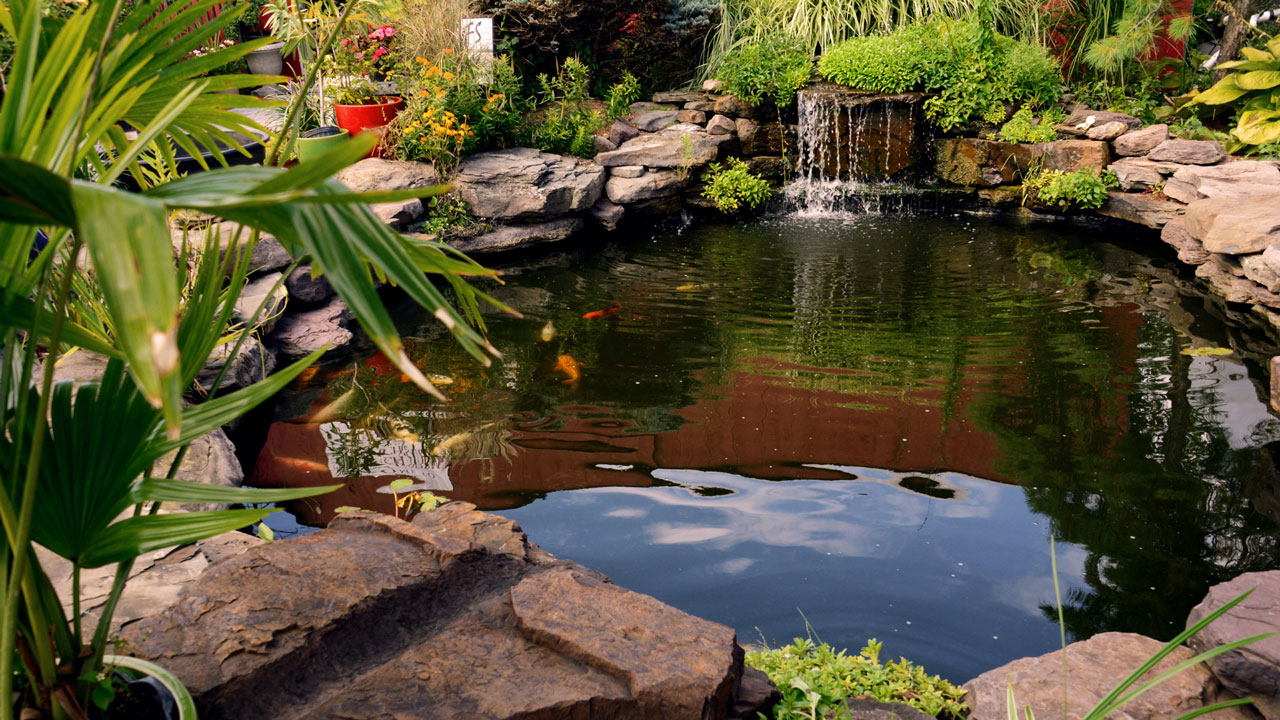
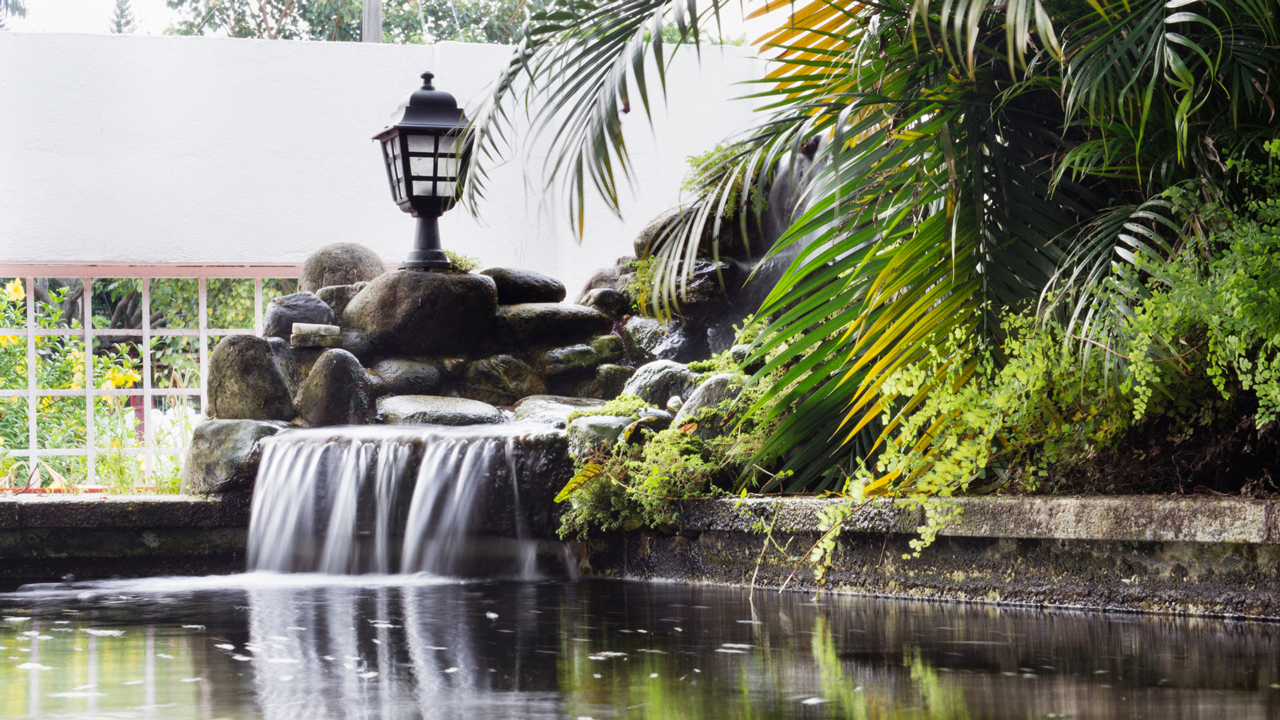
Adding a waterfall to garden ponds is an easy way to oxygenate the water. At the same time, it brings a constant and calming sound of cascading water. If you already have a waterfall, try adding a second smaller one, which can result in a more visually interesting pond. Using rocks, you can also enhance that first waterfall by tweaking the sounds that it makes. 

Set Up A Fountain

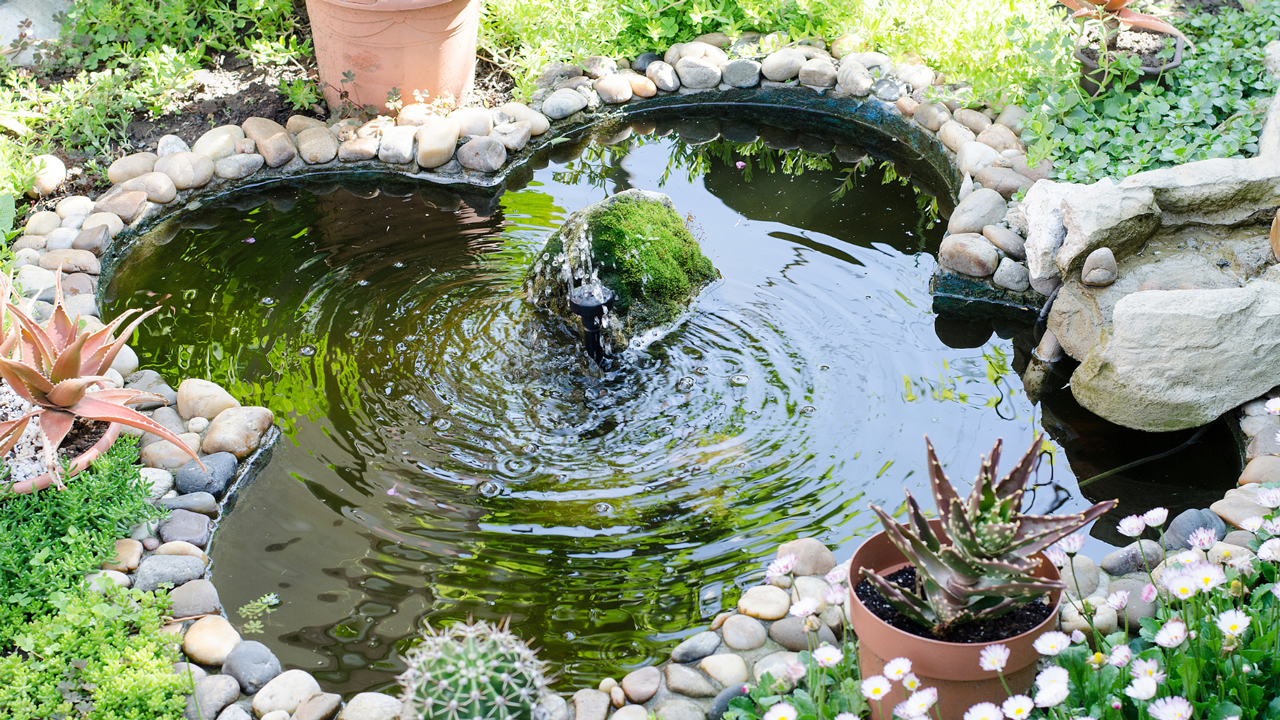
Like waterfalls, fountains improve the aeration and beauty of your water garden. That’s why, if you’re not into the idea of adding a second waterfall, you can get a fountain instead. The best places to add it are along the side or in the middle, where it can serve as a centerpiece.

Get A Spitter

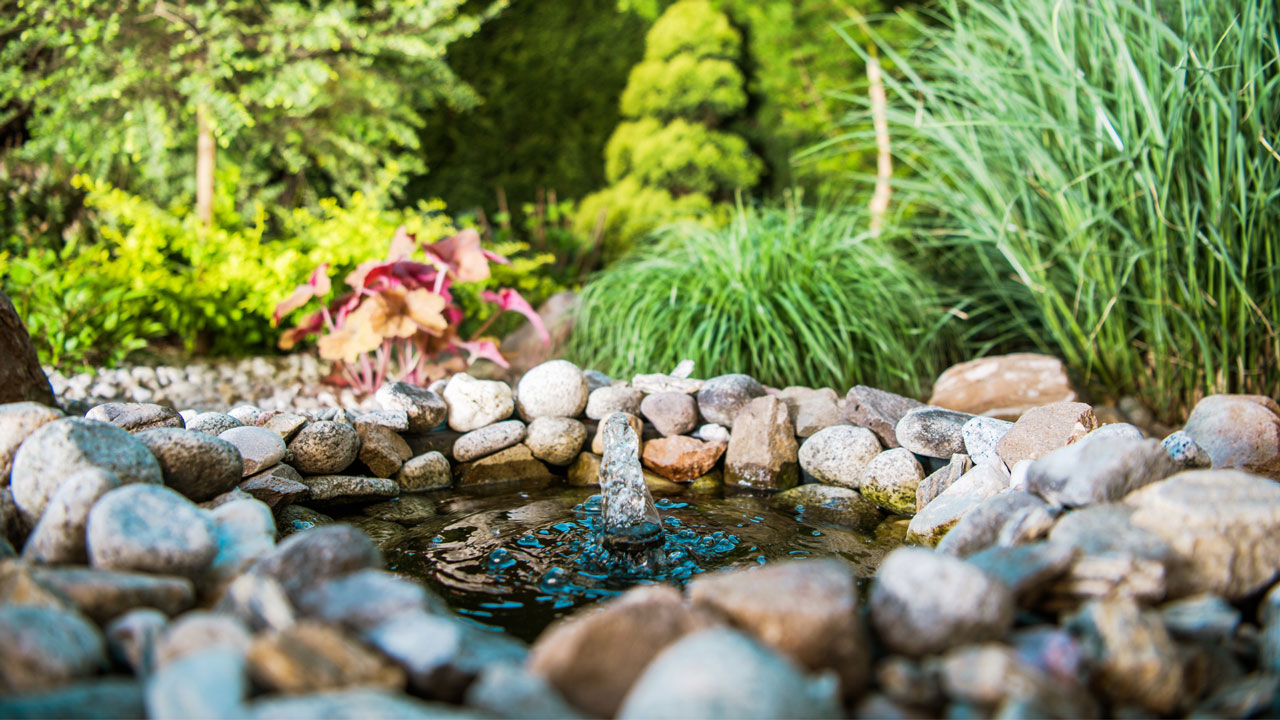
Your third option for pond aeration is spitters. As the name suggests, they produce a steady stream of water for the pond. These playful water features can be added anywhere you like, though they’re typically found at the center. Don’t be afraid to be creative, though, and place them where they’re least expected.

Add Fish

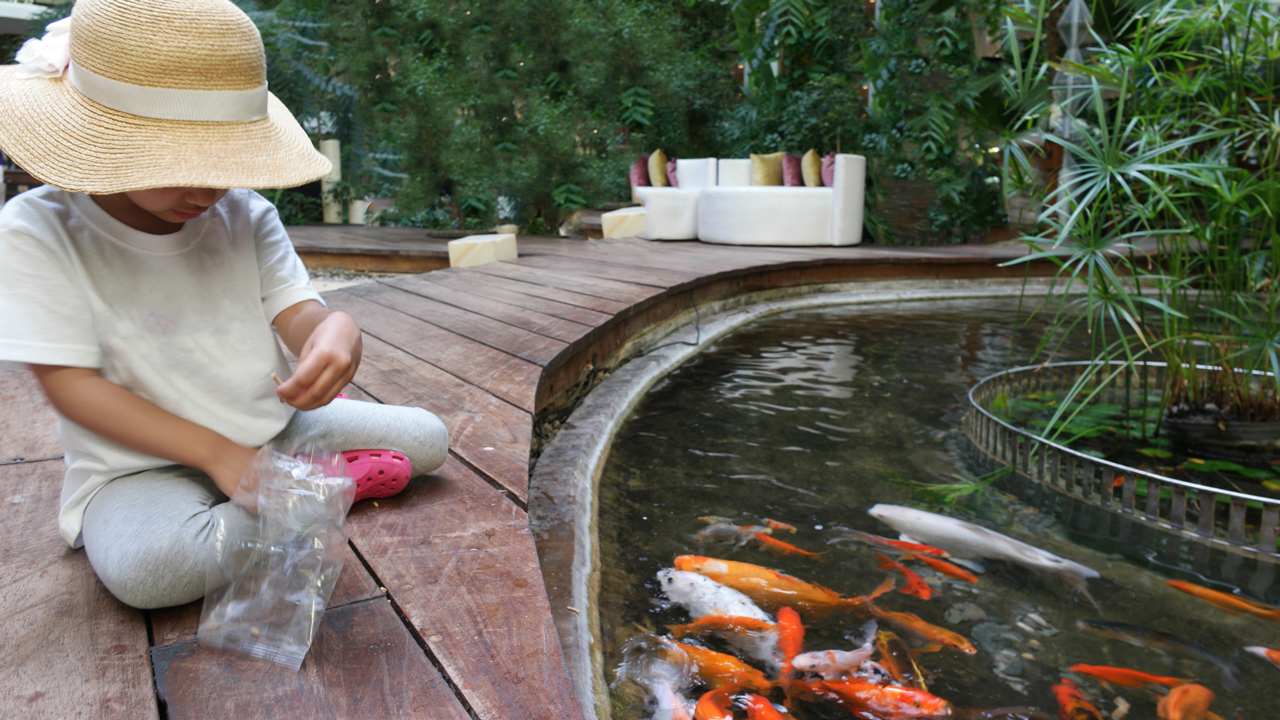
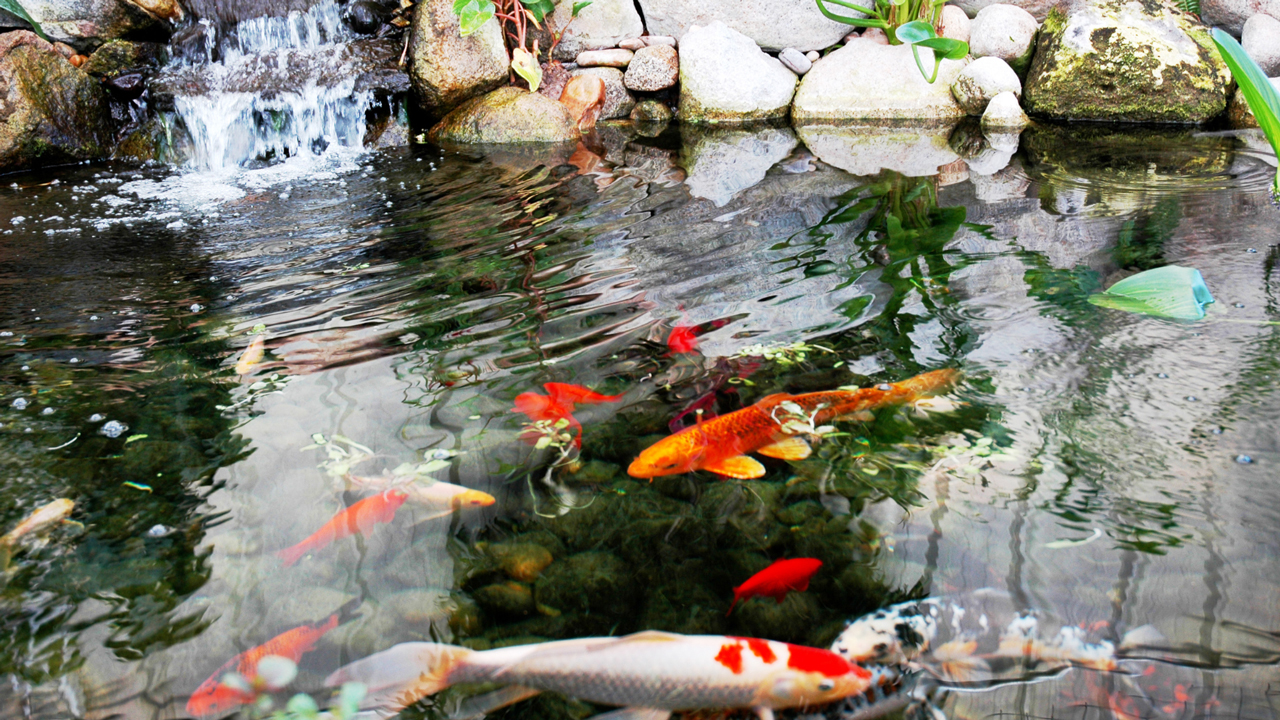
Taking care of fish is an excellent way to bring your water garden to life. It can also alleviate stress while you relax by the pond, feeding them and watching them swim. If you already have fish, you should consider adding one from a different species to expand the ecosystem. You should be able to get some easily from your local pet store.

Place Aquatic Plants

Water lily pads are a safe choice for water plants. They can provide shade, improve the water quality by controlling algae growth, and serve as a haven for your fish from predators; their vibrant color is just a bonus. There is an almost infinite selection of water lilies available online or at garden centers and pond shops, including hardy and tropical species.

Get The Garden Pond Or Water Garden Of Your Dreams Today

You can easily install pond accessories like floating plants and lights by yourself, but some can be too technical. If you plan on spicing up your water garden with a waterfall or fountain, you’ll need professional services from OC Pond Service! Learn about our landscape services and more when you call 949-653-2305 today.

How To Grow Colorful Water Lilies In A Water Pond How To Grow Colorful Water Lilies In A Water Pond

How To Grow Colorful Water Lilies In A Water Pond

Water features, like a garden pond or small pond, in your backyard already create a magical atmosphere. Imagine what it can do if you add colorful waterlilies into the mix.

If you don’t have any ideas as to how to go about it, don’t worry. We’ve laid out five easy steps just for you! But before that, let’s discuss the benefits of adding aquatic plants to backyard ponds.

Benefits of Adding Aquatic Plants To Backyard Ponds

Vegetation in your garden pond is essential for aesthetic and practical reasons. Known as aquatic plants, they help liven up the environment while keeping the water clean and aerated. They may also offer partial shade for the fish, serve as food, and manage algae growth.

Steps To Growing Water Lilies For Your Outdoor Water Pond

Now that we know why adding plants to your outdoor water pond is so important, let’s go through the five steps of planting color water lilies.

Step 1: Pick Your Container

You can choose a container with or without drain holes; it’s your choice. What’s important is that it’s shallow and spacious, roughly eighteen inches wide and ten inches deep. If you choose to get one with drainage holes, make sure the container is lined with burlap. That keeps the soil in and the pond water clear.

Step 2: Get Heavy Bagged Soil

Instead of light potting soil that can easily escape your pot, use heavy-bagged soil specifically for use in the garden. Avoid using soil mixed with materials like peat moss, vermiculite, or perlite. Use aquatic fertilizer pellets instead to enhance the soil. Simply push the pellets into the soil before you plant.

Step 3: Clean Your Water Lilies

Examine the tubers and remove old leaves and roots before planting to ensure they develop new roots, leaves, stems, and flowers. Only newly formed leaves, buds, and younger roots should be left behind.

Step 4: Add Tubers and Grave

Remember that tubers should be planted with their growing tips pointed up at a 45-degree angle, facing the center of the pot. They should also be placed around the sides of the pot to give them ample space. Then, prevent soil from leaving the pot by covering it with gravel. You can either use tiny stones or pea gravel.

Step 5: Place The Plant In Your Backyard Pond

Lower the plant while still in its container at a slant into the pond so excess air can escape. Have the pot’s bottom at a depth of 12 to 18 inches. All the leaves will rise to the top and float there. If the pond is deeper than 18 inches and there are no ledges for it to rest on, you will need to use rocks to keep the container at the ideal depth.

Hire Professionals To Install Water Gardens, Your Pond Liner, And More

While planting lilies for your water garden is easy enough to do all on your own, there may be other, more complicated water features like waterfalls that you would need help with. Whether it’s your garden’s very first pond or your next koi pond that you want, we’re sure that we can help.

To get a free quote and get the best deals on landscaping services, contact OC Pond Service at 949-653-2305 today!

How To Clean An Outdoor Water Fountain How To Clean An Outdoor Water Fountain

How To Clean An Outdoor Water Fountain

No matter how big or small they are, outdoor fountains are a surefire way to liven things up in your backyard.

While they are stunning works of art, they can become an eyesore quickly if you don’t clean or maintain them properly.

To make it easier for you, we’ve broken down the typical process of cleaning your outdoor water fountain!

Read Your Water Fountain’s Manual

Use an incompatible chemical for your fountain could lead to permanent harm. That’s why, before anything else, you should read the manufacturer’s manual. Make sure to find out about the materials used to create your fountain so that you only use the proper tools and chemicals.

Empty Your Fountain

To completely drain the fountain basin, a wet/dry vac may be necessary depending on its size. Pull the pump’s plug from the wall before discarding all the water and letting the basin dry completely to prevent the engine from overheating.

Rinse Your Fountain With Clean water

Fill the fountain up and let it flow with running water. Make sure all the lines are clear by flushing them out first. You can also use a rag so you can rinse the fountain properly. While doing so, see if there are any algae stains that may require more attention later on.

Clean Your Fountain Pumps

Remove the pump from the fountain and disassemble it in a well-lit area. Don’t use substances that aren’t specified as safe by the manufacturer, and make sure that you thoroughly rinse your unit after using soapy water to clean it.

Soap can destroy a pump in less than a day. For those hard to reach places, you can use an old toothbrush.

Unclog Spouts And Tubing

It may be necessary to use specialized equipment to clean the fountain’s piping and tubing. For an easy yet effective way, you can use a pipe cleaner.

Avoid further clogging by making sure each tube is thoroughly cleaned. After that, you should inspect your tubings as blocked lines may burn out the pump and even cause leaks.

Wash The Basin

Rinse off the fountain basin and refill it with clean water. Some fountains can be cleaned with high-pressure washing methods, although you have to check first if that’s safe to do on your fountain. To maintain a sparkling appearance, pressure washing is a great option for cleaning cast stone fountains.

Scrub Off Dirt and Stains

Scrubbing the affected area with a toothbrush and some detergent should help you remove dirt and other debris. However, note that some stains may be harder to get rid of compared to others.

Dish soap can be used to remove most stains from a fountain basin if you don’t have any other cleaning supplies on hand, but you may need to put in some extra effort.

Rinse Out Your Fountain Again

You’re almost done. Eliminate lingering chemicals on your fountain’s surfaces, the  drain the basin once again with the wet/dry vacuum. See to it that the fountain’s basin is spotless. You need to be sure that you have successfully eliminated all traces of algae from your fountain.

Frequently Asked Questions

Even after reading through the steps above, you may have more questions about cleaning and maintaining your outdoor fountain. Below are a few questions that you may have.

How much would it cost me for an outdoor fountain repair?

It depends on the age of your fountain or the complexity of the job. Water fountain repair can cost you about $500 to $1,200.

How can I remove the mineral buildup on my fountain basin?

You can scrub off calcium buildup or any other natural mineral with a soft bristle brush or sponge

How would I know if it’s time to get a replacement pump?

You would know that it’s time to get a replacement pump if there’s a coolant leak, rust or corrosion, or whining noises. Other signs include an overheating engine and radiator steam.

Get Professional Help For Your Dirty Or Broken Fountain

Looking for someone to help you fix or clean your water fountain? How about someone to set it up for you?

Orange County Outdoor Water Fountain Designs can do it all. Allow us to give you the garden of your dreams. Contact us at 949-653-2305 and ask for a free quote today!

7 Best Types of Pond Fish for Garden Ponds 7 Best Types of Pond Fish for Garden Ponds

7 Best Types of Pond Fish for Garden Ponds

7 Best Types of Pond Fish for Garden Ponds

Building a garden pond is always a fun and exciting process. From digging a pond hole and adding a filtration system to decorating it with aquatic plants and rocks, there’s never a dull moment.

If you already have your pond set up, you probably can’t wait to start filling it up with fish. Before you head to the store, though, you should first learn about the different species that could survive and thrive in backyard ponds.

Here, we break down the best fish to get for your backyard pond!

1. Koi

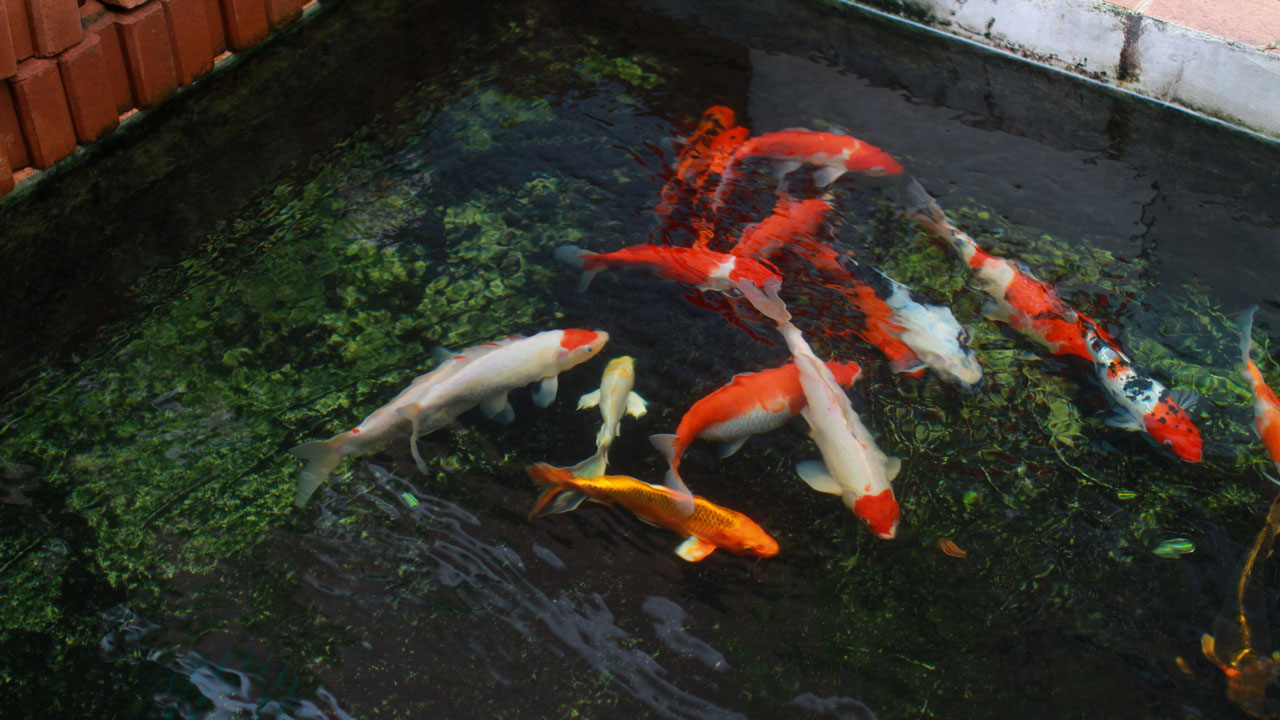
Koi have evolved to thrive in the great outdoors, making them an excellent choice for your garden pond. They are extremely resilient and can handle hot and cold temperatures. The only downside is that they can grow to over two feet! You can keep them in smaller ponds when they’re younger and just around five to seven inches, but you may have to transfer them to a large pond after some time.

2. Catfish

Some pond owners would actually argue that it’s a bad idea to have catfish as pets in an outdoor pond. That’s because they tend to bite and kill fish that are sometimes even bigger than they are. Most of the time, they’re laid back, but you never know when they might flip the lid. Our advice is to be cautious and don’t place them in a pond with defenseless fish like koi or goldfish.

3. Sterlets

The sterlet is a wonderful fish to keep in your pond due to its adaptability and ability to thrive in colder climates. Their average age is between 22 and 25, they can be distinguished by their black skin, white stripes, and fimbriated barbels.

Keep in mind that some of the proteins in commercial pellets may be too difficult for them to digest. In addition, sterlets can become entangled in aquatic plants, so don’t put too much water plants.

4. Common Goldfish

Common goldfish are generally peaceful creatures, and they can get along with almost anything in the pond. However, you should be careful as smaller types of goldfish can fall prey to fish like golden orfes. Temperatures between 68 and 72° F (20 and 22 degrees° C) and pH levels between 7.2 and 7.6 are ideal for goldfish.

5. Weather Loaches

Weather loaches can tolerate water temperatures between 40 and 77 °F (4.5 and 25 °C), allowing them to survive winters in outdoor ponds. As they are quite sociable and prefer to congregate in small groups with others of their kind, you will want to acquire many of them.

Plus, they may reach a height of a foot and are not discriminating eaters. They’ll happily chow down on almost anything including algae, insects, veggies, and food pellets.

Types of Fish That Pond Owners Should Avoid

Since there are ideal fish to add to small ponds, there are of course going to be bad ones. Before you build a pond, try not to get the types of fish below.

Fancy Goldfish

Fancy goldfish are known to be slow and clumsy, so it would be a bad idea to place them in a pond. When it’s feeding time, they’ll easily be left behind and may even starve to death. They’re also incredibly vulnerable to illness and infection.

Plecostomus

Plecostomus should never be kept in a pond unless you are in a tropical climate. P lecos are often introduced to ponds in an effort to control algae growth. Unfortunately,  these fish are used to warmer climates and won’t survive the cold.  Their carcass could then cause serious water pollution that can kill off other species.

Hire Professional Garden Pond Services Today

Need help installing your garden pond? You’ve come to the right place. The OC Pond and Fountain Care design team is equipped with materials and in-depth knowledge for all your water feature needs.

We can help you decorate, clean, and maintain your pond by adding essentials like pond liner, decorative rocks, and more.

To begin, contact us at 949-653-2305 and get a free quote today!

Outdoor Water Fountain Maintenance Tips Outdoor Water Fountain Maintenance Tips

Outdoor Water Fountain Maintenance Tips

There are a variety of outdoor garden water fountains to choose from, allowing you to choose one that suits your yard perfectly. To enhance the element of style and charm to your backyard, garden, or patio, installing an outdoor fountain is one of the best options you can make.

The fountains can be decorated with a sculpture or recognizable figurine as a part of the design that gives them a more pleasing appearance. You will usually be able to pick the size of outdoor fountains based on what suits your personal tastes. 

However, in the absence of proper care, it’ll lose its appeal and aesthetics. It is best to keep in mind the importance of broken fountain repair. Wind, rain, dirt, and debris can damage them if they are not maintained and cared for properly.

Can You Repair a Cracked Fountain?

In maintaining your outdoor water fountain, cracks and damages are a significant concern. Now, you may wonder if it is possible to repair a cracked fountain—the answer is yes!

There is a possibility that these fountains can chip or crack over time due to the weather and other elements. As long as you catch cracks in fountains before they become a serious problem, most can be repaired.

When performing a fountain repair, it is important to ensure that the material used is compatible with the fountain’s—epoxy-based patching materials work best with concrete fountains, while waterproof silicone sealant or similar fillers work on metal or fiberglass fountains.

Tips on How to Clean Your Outdoor Water Fountain

In comparison with an indoor fountain, keeping an outdoor fountain clean can be challenging. Outdoor fountains are exposed to the wind, leaves, dirt, animals, rain, snow, and raindrops, depending on their climate. Indoor fountains tend to gather dust and fingerprints.

In general, cleaning a smaller fountain will take less time, unless there are many intricate parts to take care of. Larger fountains, on the other hand, are able to hold more water and therefore have more space for deposits to accumulate. 

Empty the Fountain of Water

It will be necessary to drain all the water from the fountain basin. The first step to draining a fountain is to read the maintenance instructions and learn how to disassemble the pump as well as which chemicals to use.

It is crucial to unplug the pump before draining your water fountain to prevent burnout or wearing down.

Depending on the size of the fountain basin, you can scoop the water out using a pail or pitcher. Remove any debris to avoid clogging the pump. As an alternative, you can always siphon the water from the container with a hose, or use a wet & dry vacuum to completely empty the fountain basin.

Clean the Water Fountain Pump Thoroughly

In order to keep the fountain pump free of debris and obstructions, it is important that the pump is cleaned every three months. For more information about how to detach your pump, please refer to your owner’s manual.

Remove any debris or buildup from the pump with a cloth to make sure it is thoroughly clean. Wash the inside of the pump by opening the cover and wiping it down. Using an old toothbrush, you can clean out hard-to-reach places.

It is very important to rinse your pump off to remove any soap that might be left on it and to avoid using chemicals that have not been approved by the manufacturer. Rinsing your pump off completely after washing can prevent it from being ruined by soap within a day. You will need no replacement pump for a long time if you perform regular pump maintenance.

Scrub Clean Your Outdoor Water Fountain

Water fountains can be cleaned with soapy water depending on how often they are maintained. Algae removal products are needed if there is extensive algae growth. Algae growth is more prevalent in fountains located in the sun than those situated in the shade.

Cleaning your fountain with a non-abrasive tool is always recommended, no matter what the material is. It is a good idea to buy a dedicated cleaning solution for water features or to fill a bucket with warm water mixed with a little mild dish soap.

Use rubber gloves when scrubbing the inside and outside of your water feature with a cloth, or a non-abrasive brush if dealing with tough stains. When it comes to cleaning small nooks and crannies around the house, an old toothbrush can come in very handy.

Maintaining the appearance of your fountain is as easy as wiping it down every four to six months to prevent a buildup of dirt and debris. It is also a good idea to take a deeper look every few months. Make sure you use a mild cleanser and a non-abrasive brush to clean the bowl. 

Rinse Clean Your Outdoor Water Fountain

The fountain’s walls should now be rinsed to remove any chemicals. You don’t want any cleaning solution left behind since you are likely to attract birds, butterflies, and dragonflies. Wildlife and your pets may occasionally help themselves to your water feature if it sits low to the ground. 

Inspect the basin of your fountain to ensure that all stains have been removed.  Algae can come back quickly so you need to be sure that you have completely removed any algae from your fountain during this process.

You may also want to consider adding an animal-friendly water treatment product to your water fountains when refilling them with water. This will help reduce algae growth.

Hire Professional Pond Repair Service for Your Needs

In the event that you do not have the time or resources to ensure that your water fountain is cleaned, maintained, and repaired, it is still recommended to hire a professional to do the task.

You can rest assured that we will take care of all of your outdoor fountain repair and cleaning needs in an efficient manner while doing it the right way.

Get a free quote from us and to learn more about our services, contact us at 949-653-2305 at OC Pond Service today!

A Step-by-Step Guide on How to Use Repair Kits for Preformed Molded Ponds Preformed Pond Repair Kit: Doing it Yourself

A Step-by-Step Guide on How to Use Repair Kits for Preformed Molded Ponds

Key Takeaways

  1. A quality preformed pond repair kit includes adhesive compounds and patches specifically designed for rigid pond structures.
  2. Successful plastic pond repair requires proper drainage, surface cleaning, and allowing adequate curing time for adhesives.
  3. Professional leak detection involves checking water levels, inspecting for wet spots, and systematically testing different pond sections.
  4. Whether you have a rubber pond liner or plastic model, using compatible repair materials ensures lasting fixes.
  5. DIY pond liner repair works well for small holes, but extensive damage requires professional replacement services.

Specifically, preformed molded ponds utilize butyl rubber liners or plastic liners to establish the shape of a garden pond or even koi ponds. These kinds of garden ponds are typically installed in-ground or above ground and surrounded by concrete, which could deteriorate and crack with time. Whether you have a standard rectangular design or kidney shaped pond liner, proper maintenance prevents pond leak issues.

Over time, cracks or other damage to the pond liner can cause a decrease in the level of the pond water aside from water evaporation. Don’t worry, you can purchase a pond repair kit for your leaking pond liner. A quality plastic pond repair kit includes repair patch materials designed for your specific pond liner material.

The following are steps to fix preformed pond problems in your yard using DIY kits.

Step-by-Step Guide: How to Repair a Preformed Plastic Pond

In order to fix a leaking preformed pond liner, you should first make sure it’s the liner and not something else that’s causing the leak. Following the identification of the leak’s cause, it’s time to decide how to fix it. Professional pond leak repair starts with identifying whether flexible liners or rigid structures show damage.

The following is a step-by-step guide on how to fix molded pond problems using preformed pond repair kit:

Remove Fishes, Pond Plants, and Drain Your Pond

When you empty your garden pond, fill the holding tank, buckets, or other containers with pond water and remove the pond’s fish, plants, and rocks. This way, they won’t be affected by the falling water level when you drain the pond. A sudden decrease in water level can stress aquatic life during plastic pond repair procedures.

Locate the Leak and Clean the Pond’s Surface

After locating the leak, you may mark the leak’s location in the liner with a grease pencil or other marking tool. Most pond liner repair kit options include seam tape for reinforcing vulnerable areas around patches.

Leaks in preformed liners are often noticeable cracks or tears, but they are hard to locate in shallow ponds. Search for wet spots around the area to find where the leak is.

Apply an Adhesive Compound

If you are using a patch kit that includes an adhesive compound, apply a thin layer around the leak—it is typically epoxy or another adhesive and needs to be set up slightly before the patch can be applied.

This step can be skipped if your patch kit does not contain an adhesive compound.

Use the Patch to Cover the Leak

The patch should be removed from its paper backing if it has one. Cover the leak with the patch, but be sure to avoid air bubbles or wrinkles in it that could further allow water to leak and let the adhesive set fully.

Depending on the bond, this could take up to a few hours or even a day.

Dry Your Pond and Do a Leak Test

When the pond is dry, refill the pond using your garden hose. Check the water level from time to time to see if leaks are still there. The best way to determine if your pond is leaking is to fill it up with water and then check if a leak is still present or if there are wet patches around the pond.

Refill Your Pond with the Fishes, Plants, and Water

Add fish, aquatic plants, or stones you removed earlier back in the pond, and add the water where they were placed to the repaired pond to help the fish adjust. Do not forget your pump and filtration system to protect your backyard pond from dirt and debris, and can prevent algae growth.

Professional Pond Repair Services for Your Needs

When a garden pond liner is damaged or has small holes, you can fix them yourself, but if the hole is large or there is a great deal of damage, you should let professionals replace it with a new liner. When experiencing considerable damage beyond simple patches, professional installation ensures proper repair.

Our team of pond experts at OC Pond Service will help you with any pond liner leaks and garden repairs. We can even recommend a high-quality pond liner for a long-lasting garden pond. We also install a high-quality backyard pond or beautiful water features that create a serene outdoor space for you and your family to enjoy.

To learn more about our services, you may contact us at 949-653-2305 at OC Pond Service today!

Frequently Asked Questions

Q1. What type of kit should I use for my pond material?

A plastic pond repair kit works for rigid preformed ponds, while flexible ponds need different solutions. Choose the type of kit based on your liner material—rigid plastic requires epoxy-based patches, flexible materials need adhesive-backed patches.

Q2. How to repair a preformed plastic pond with water still inside?

Learning how to repair a preformed plastic pond typically requires complete drainage for proper adhesion. Attempting repairs on a pond with water prevents patches from bonding correctly and usually fails within days.

Q3. Can I use a rubber liner kit on my kidney shaped pond?

A kidney shaped pond liner can use either rubber liner kit materials or plastic options depending on original construction. Match repair materials to your existing liner type for compatible chemical bonding and flexibility.

Q4. Do I need special pond liner repair kit tools for installation?

Most pond liner repair kit packages include necessary tools, though professional-grade repairs might require heat sealing equipment. Basic kits contain patches, adhesive, and cleaning supplies sufficient for typical homeowner repairs.

Q5. When should I hire a pond contractor versus DIY pond leak repair?

For minor pond leak repair under 2 inches, DIY works well. However, hire a pond contractor for multiple tears, seam failures, or when plastic liner kit repairs fail repeatedly. Professionals ensure proper pond liner patch application.

4 Tips on How to Choose a Trusted Orange County Fountain Repair Company 4 Tips on How to Choose a Trusted Orange County Fountain Repair Company

4 Tips on How to Choose a Trusted Orange County Fountain Repair CompanyEven if you are able to fix some fountain issues on your own, there are some types of damages or major cracks that should be fixed by a professional. A trusted garden water fountains maintenance service includes landscaping, repairing, washing concrete, and keeping water features clean.

This must be done by a trusted garden fountain business. Luckily, there are companies within California that offer these types of services.

What to Look for in a Fountain Repair Business?

In case you are looking to hire a trusted company for garden fountain repair in Orange County, CA, the following are a few things to consider when looking for a fountains business to guarantee that you are extremely happy with the service you will receive:

Years of Experience

For proper fountain repair needs, it is essential to have both the knowledge and hands-on experience. While some issues can be easily fixed and done by you, others are more complex.

Hiring an inexperienced or unqualified technician to conduct repairs increases the possibility of cracks and leaks occurring again. If you are looking for the best repair service, consider their years of experience.

The water fountains you have installed in your home are a significant investment, which is why you should entrust any repair or maintenance duties to a professional.

Choosing a technician with the right equipment and at least ten years of experience will ensure that you’ll be provided high-quality work with minimal possibility of an issue recurring, which is definitely your money’s worth.

Great Customer Service

In order to answer all your concerns about your backyard fountain, such as the cause or the cost of any repair, your technician should provide you with a free quote and consultation prior to beginning any work on your property.

A business with an excellently working website is strongly recommended, this means you’ll know their contact information in case you need to reach out to them.

To avoid being surprised with unexpected costs, you must first establish clear communication with your technician. During the initial assessment, ensure that they give you a detailed quote and fair price regarding the extent of the damages to your fountain.

Portfolio of their Jobs

Trusted pond and fountain repair services in Southern California must also provide design process and installation services, making their existing work portfolio a helpful way for you to see the quality of their work.

It is highly recommended to search or request samples of their past work before choosing a technician. If you see that a team has built fountains or has fixed usability-related issues like yours, then it can be an assurance that they are equipped to complete successful repairs for you.

Location

It is also essential to consider whether the repair technician is easy to reach. Choose one that is close to your home or property to guarantee that the entire process of receiving their services will be done in a timely manner, as well as reducing the costs.

Residents of California should pick a company within the surrounding area like ones from Fountain Valley, Long Beach, Huntington Beach, La Habra, Santa Ana, Irvine, and Anaheim, California.

Choose a Reliable Fountain Repair Service

If you are interested in finding a trusted business for your patio needs, we will provide you with a consultation and quote free of charge to get started. Contact us at 949-653-2305 at OC Pond Fountain Service today!

A Step-by-Step Guide on How to Use Repair Kits for Preformed Molded Ponds A Step-by-Step Guide on How to Use Repair Kits for Preformed Molded Ponds

A Step-by-Step Guide on How to Use Repair Kits for Preformed Molded PondsSpecifically, preformed molded ponds utilize butyl rubber liners or plastic liners to establish the shape of the pond. This kind of garden pond may be installed in the ground or as a raised concrete pond depending on the design.

Over time, cracks or other damage to the pond liner can cause a sudden decrease in the level of the pond water as well as erode the soil around the leak. Don’t worry, you can purchase a pond repair kit for your leaking pond liner. The following are steps to fix preformed pond problems using a repair patch.

Repairing Leaky Pond Liner Leaks

Before repairing a pond liner, the first thing you should do is be sure it’s the liner leaking and not something else. When you have identified the cause of the leak, the next step is to determine how you will fix it.

You can fix small breaks in a pond liner yourself, but if the hole is large or there is considerable damage to the liner, letting professionals replace it with a new liner is better.

Guide on How to Use Pond Liner Repair Kits

It is important to know the pond liner material first before performing pond liner repair. A rubber liner kit is different from a plastic liner kit. When you discover what you have between these two liners, you will know what type of kit to use.

If you’re confident that you have a damaged pond liner and that you know what material it is made of, you can follow the steps below to fix your pond leak using a pond liner patch:

  1. When you empty your pond, fill the holding tank, buckets, or other containers with pond water and remove the pond’s fish, plants, and rocks. This way, they won’t be affected by the falling water level when you drain the pond.
  2. Pump the water out and let the liner surface dry. Having the water leak out of the damaged liner is one way to empty the pond, but this will significantly take longer and may lead to further soil erosion or damage at the leak site.
  3. After locating the leak, you may mark the leak’s location in the liner with a grease pencil or other marking tool. Leaks in preformed liners are often noticeable cracks or tears, but they are hard to locate in some cases. Search for wet spots around the area to find where the leak is.
  4. To clean the liner, remove dirt, algae, and other potential contaminants from the damaged area by scrubbing it with soap and water or with a solvent cleaner designed for plastic or rubber pond liners. A clean surface is necessary to patch a leaking pond since it helps ensure a better seal when you apply the patch.
  5. Cover the leak with the patch, but be sure to avoid air bubbles or wrinkles in it that could further allow water to leak and let the adhesive set fully. Depending on the bond, this could take up to a few hours or even a day.
  6. When the patch is dry, refill the pond with water. Put any fish, plant, or rocks you removed earlier back in the pond, pouring the water they were kept into the new pond to help the fish adjust. Check the water level from time to time to see if pond leaks are still there.

Need Help With Your Leaking Pond Liners?

Our team of pond experts at OC Pond Fountain Service will help you with any pond liner leaks and garden repairs. We can even recommend a high-quality pond liner for a long-lasting garden pond!

To learn more about our services, you may contact us at 949-653-2305 at OC Pond Fountain Service today!

How Do I Keep My Outdoor Fountain Algae Free? 4 Things You Need to Know to Maintain Water Health 4 Ways to Keep Your Outdoor Fountain Algae Free

How Do I Keep My Outdoor Fountain Algae Free? 4 Things You Need to Know to Maintain Water Health

Algaes in your backyard fountains don’t only look bad, but they also damage your filtration system and can harm you and your pets’ health.

Because outdoor fountains expose water to sunlight, this naturally creates algae blooms. Though this process is natural and unavoidable, it doesn’t mean there’s nothing you can do to prevent or slow this process. Learn about the tricks that help fountain owners maintain their water health!

Change Your Fountain Water

Change the water of your fountain at least once a month by completely draining your fountain, letting it air dry, then refilling it.

Algae grow in your water naturally. But when you change the water monthly, you get rid of the current ones and prevent their rapid spread. By doing this, you also prevent algae build up in your pump, which can lead to a clog. 

Regular Cleaning

More than just changing the fountain water, you should also clean the fountain itself every two months. Scrub your fountain surface regularly and thoroughly clean your pump by brushing its parts with a toothbrush and clean water.

When the surface of your fountain starts to develop a film or feel slippery, deep clean the fountain by emptying it of all water and scrubbing it with a brush or sponger, hot water, and some mild soap solution.

Meanwhile, when taking apart your pump, consult your fountain manual and carefully follow the manufacturer’s instructions on how to clean and assemble your pump, since all pumps are different.

Alter Your Water

Algae forms because of the chemical reaction between water and sunlight. Hence, a way to prevent algae formation is by changing the chemical properties of your water through the use of chlorine, bleach, or algaecides.

These chemicals act as a disinfectant. By adding approximately ¼ teaspoon of chlorine or bleach to every gallon of water, you can kill existing algae in your water fountain and prevent future algae growth.

Similarly, algaecides or algae preventive products, such as BioGuard and Kem-Tek, eliminate algae and prevent future spore growth, so your fountain can boast healthy water. Just keep in mind that these strong chemicals can make water toxic. So, if you have pets or children, it’s best to keep the concentration levels low, lest they drink the treated water.

Add Some Shade

Another way to prevent algae growth is to minimize the sunlight touching the water. To do this, you can relocate your outdoor fountain to a more shaded area to avoid direct sunlight exposure during the hottest times of the day.

Doing this can go a long way in slowing down the growth of algae, and help you minimize algae overall, while you practice other abovementioned tips for maintaining water health.

Water Fountain Repair

Following the tips above goes a long way in maintaining water health. But there are just some problems you can’t DIY, and you’ll need help from an experienced water fountain repair service.

Whether your fountain has deep cracks, is losing water for some unidentifiable reason, or if you have an algae disaster on your hands, we got you covered!

We help maintain all types of water features and understand backyard fountains and garden fountain repair more than anyone.

We can help restore your water feature, so you can fully enjoy your outdoor space. Contact us at 949-653-2305 at Orange County Pond Service today!

How Do I Keep My Outdoor Fountain Algae Free? 4 Things You Need to Know to Maintain Water Health How to Keep Fountain Water From Evaporating: A Practical Guide

How Do I Keep My Outdoor Fountain Algae Free? 4 Things You Need to Know to Maintain Water Health

A fountain that constantly needs topping off is frustrating. The water level drops faster than expected, the pump starts making noise as it sucks air, and you’re hauling the hose out every other day. Most homeowners assume something is wrong with the fountain itself, but in many cases the answer is simpler: water evaporation. A water feature in a sunny, dry, breezy outdoor space can lose 1/4 to 1/2 inch of water per day to evaporation alone, and that adds up quickly. Knowing how to keep fountain water from evaporating reduces refill chores, protects the pump, and supports better water conservation across the property. For homeowners who suspect the problem may be a leak rather than weather, our step-by-step guide on why your fountain keeps losing water walks through the diagnostic process.

Here’s what we break down in this guide: what causes fountain water to evaporate faster than normal, six practical adjustments that slow it down, the warning signs that point to a leak instead of evaporation, and the common mistakes that quietly make the problem worse. We also cover when an auto-fill system makes sense, how a fountain cover changes the math during hot weather, and the placement tweaks that reduce wind-driven loss. For homeowners with active maintenance routines, our outdoor water fountain maintenance tips post is a useful companion read.


Key Takeaways

  • Knowing how to keep fountain water from evaporating starts with identifying the four main culprits: direct sun exposure, hot weather, wind, and splash from overspray, each of which calls for a different fix.
  • Simple, low-cost adjustments to spray height, basin position, and shade placement cut daily water evaporation by 30 to 50 percent without changing the look of the fountain.
  • A fountain cover or lid used during off hours and overnight protects against the heaviest evaporation losses, especially during summer months when surface water temperatures stay high after sundown.
  • Auto-fill valves and refill systems tied into the home’s water supply system handle the inevitable losses without manual refilling, which keeps the recirculating system from running dry and damaging the pump.
  • When water loss exceeds normal evaporation rates, the cause is usually a leak, crack, or plumbing system issue rather than the weather, and our specialists at Orange County Pond Services can pinpoint the source quickly.

How to Keep Fountain Water From Evaporating Starts With Knowing the Causes

Before changing anything, understand what’s pulling water out of the basin. Evaporation isn’t a single problem; it’s a combination of physical conditions acting on the water surface every minute the fountain runs. The bigger the surface area exposed, the faster the water drops.

Four factors drive most fountain water evaporation:

  • Sun exposure. Direct sunlight raises the water temperature, which speeds the conversion of liquid to vapor. A fountain in full afternoon sun can lose twice the water of a shaded one.
  • Air temperature. Hot weather increases the air’s capacity to hold moisture, which accelerates evaporation off the water surface. Days above 85°F push losses sharply higher.
  • Wind and air movement. Moving air carries away the humid layer that forms just above the water, allowing more evaporation to take its place. Even a light breeze doubles the evaporation rate compared to still air.
  • Splash and spray loss. Water that leaves the basin as spray, mist, or spill over never returns. This is technically not evaporation but it shows up the same way: a lower water level than yesterday.

Most homeowners are dealing with two or three of these at once. A fountain in a sunny spot with a tall spray pattern and an exposed basin is going to lose water no matter how well-built the unit is. The fix isn’t a single change; it’s a combination of small adjustments that each chip away at the loss.

How to Keep Fountain Water From Evaporating: Reduce Sun and Shade Exposure

Sun exposure is the biggest factor in fountain water evaporation, and it’s often the easiest to address. Even partial shade during the hottest hours, roughly 11 a.m. to 4 p.m., can cut evaporation losses by 30 to 40 percent.

Practical shade options:

  • Plant a shade tree or tall shrub on the south or southwest side of the fountain. Native species in Orange County, like coast live oak or California lilac, deliver shade without becoming high-maintenance.
  • Add a pergola, gazebo, or shade sail above the fountain. These work well for architectural water features that anchor a patio or seating area.
  • Position a freestanding umbrella during peak summer days. This is the lowest-commitment option and works for tabletop or smaller backyard fountains.
  • Move portable fountains to a shadier corner of the outdoor space if the original placement was too exposed.

Shade also benefits the fountain in other ways. Less direct sun means less algae growth, slower mineral buildup, and a longer life for the pump and electrical components. For more on how shade interacts with algae control, our post on eco-friendly, bird-safe algae control solutions covers the full picture.

If shade isn’t an option because the fountain anchors a sunny patio, focus on the other adjustments below. The combined effect can match or exceed what shade alone delivers.

Lower the Spray Height to Reduce Splash and Spill Over Loss

Tall spray patterns look impressive but they’re also the largest source of non-evaporation water loss. Water shot 18 inches above the basin breaks into smaller droplets that evaporate before returning, get carried away by wind, or splash beyond the basin edge. Lowering the spray height alone can cut daily losses by 20 to 30 percent.

Most fountains let you adjust spray patterns through one of these methods:

  • The flow control valve on the pump or in-line with the supply tubing
  • The nozzle or spray jet at the spray point, which often has interchangeable inserts for different patterns
  • The pump speed setting if the pump has a variable speed control or rheostat

Reduce the height in small increments, watching the basin’s water line over a few days. The goal is the lowest spray that still looks the way you want and keeps the water sound. Pair the lower spray with a check of the basin perimeter for spill over points where water leaves the catchment area. Low spots on the rim, gaps between stones, or worn caulking can let water escape during normal operation.

For fountains with a pond as the catch basin, a slightly raised lip or a strip of native stone along the perimeter contains splash and keeps it inside the recirculating system. Small bog plants or marginal aquatic plants placed along the edge also absorb the splash and look natural in the process.

Add a Fountain Cover for Off Hours and Hot Weather

A fountain cover or lid placed over the basin when the fountain isn’t running is one of the most effective single moves you can make against water evaporation. A cover blocks sun, slows wind across the water surface, and traps the humid layer just above the water, which together cut evaporation by 60 to 80 percent during covered hours.

Cover options range from simple to integrated:

  • Pre-fabricated fountain covers sized to common basin shapes, available from outdoor home stores
  • Custom-made vinyl or canvas covers for unusual basin shapes or larger water features
  • Hinged wooden lids for tabletop and smaller pedestal fountains, which double as a decorative finish when closed
  • Pool-style mesh covers for larger pond-like fountains, which catch debris while still allowing some air exchange

Use the cover overnight, during heat waves when daily temperatures climb above 90°F, and during longer absences like vacations. A weighted edge or strap system keeps the cover in place during wind. For fountains in regions with significant temperature swings, a cover also reduces the strain on the pump from cycling through hot, oxygen-depleted water.

If you don’t want a removable cover, a partial floating cover, like a sheet of foam or a few aquatic plants on the surface, achieves a similar effect during the day. Floating plants in particular reduce evaporation by 40 to 50 percent on the area they cover and look natural in most fountain styles.

Install an Auto-Fill or Automatic Refill System

Even with shade, lower spray, and a cover, some evaporation is unavoidable. An auto-fill valve or automatic refill system tied into the home’s water supply system handles the small daily refills, which protects the pump from running dry and saves the manual refill routine.

A typical auto-fill setup includes:

  • A float valve mounted in the basin, set to maintain a target water level
  • A 1/4-inch supply line from a nearby outdoor spigot or irrigation hookup
  • A shutoff valve and pressure regulator at the connection point
  • An optional water filter or softener cartridge to reduce mineral buildup

The float valve releases a trickle of fresh water whenever the basin level drops below the set point. Most setups use less than 5 gallons per week even on hot summer months in sunny locations, which is well within most municipal water budgets. The system runs quietly in the background and keeps the fountain looking right without homeowner intervention.

For homeowners with existing irrigation systems, the auto-fill line can tap into a drip zone, which makes the install simpler and avoids new plumbing system work. A licensed plumber can handle more complex setups that involve a dedicated supply line. Pairing the auto-fill with a slow-drip overflow drain prevents flooding if the float valve ever sticks.

Address Wind Exposure to Slow Fountain Water Evaporation

Wind drives evaporation by sweeping away the humid air that builds up just above the water surface. Replace that humid layer with dry incoming air, and the evaporation rate jumps. Reducing wind exposure around the fountain is a quieter improvement than the others on this list, but it’s surprisingly effective.

Practical wind reduction:

  • Plant a hedge or windbreak on the side facing prevailing winds. In most of Orange County, that’s the southwest. Native shrubs like ceanothus or toyon work well.
  • Add a screen, lattice panel, or low wall between the fountain and the wind source. Anything that breaks the wind without fully blocking airflow helps.
  • Reposition the fountain against an existing wall, fence, or building corner that already blocks wind from one or two sides.
  • Drop the spray height as discussed above, since taller spray catches more wind than shorter spray.

Wind protection also keeps debris like leaves, dust, and pollen from blowing into the basin, which means less cleaning between maintenance cycles. The same windbreak that slows evaporation extends the life of the water and reduces filter loading.

In coastal Orange County areas where afternoon winds are predictable, timing also matters. Running the fountain during calm morning hours and pausing it during the windiest part of the day cuts daily losses without affecting the times you actually enjoy the water feature.

When Water Loss Isn’t Evaporation: Leaks, Cracks, and Pump Issues

Sometimes the problem isn’t evaporation at all. A fountain losing more than an inch of water per day in moderate weather almost certainly has a structural issue rather than a weather one. Knowing how to tell them apart saves time and gets you to the actual fix faster.

Signs the loss is a leak or crack:

  • Water level drops at the same rate even on cool, overcast days
  • Wet patches or persistent moisture in the soil around the fountain base
  • Mineral deposits or white residue along visible cracks in the basin
  • The water level always drops to the same line, suggesting a crack at that height
  • Drop continues even when the pump is off for 24 to 48 hours

The 24-hour test is the simplest diagnostic. Turn the pump off, mark the water line with a piece of tape, and check it again the next day. Normal evaporation in mild weather should be less than 1/4 inch in 24 hours with the pump off. More than that points to a leak. For a more thorough method, our post on diagnosing fountain water loss walks through dye testing and other techniques.

Pump issues are another non-evaporation cause. A pump that pulses, runs hot, or makes new noises may be losing prime, splashing water unevenly, or pushing water past the intended catchment area. Our guide on why a water fountain pump might not be working covers the diagnostic steps.

Common Mistakes That Speed Up Fountain Water Evaporation

Several common habits work against water conservation efforts. Avoiding these keeps the other adjustments working as intended.

Mistake What Goes Wrong How to Avoid It
Running the fountain 24/7 in summer Maximum daily evaporation, pump stress Run during peak enjoyment hours; cover or pause during peak heat
Topping off with cold water Splashing increases as cold water hits warm basin Add water gradually; let it warm to ambient before refilling fully
Skipping basin cleaning Mineral buildup roughens the surface, increasing evaporation area Clean every 4 to 6 weeks during summer
Leaving the basin lip unsealed Water wicks over rough edges and evaporates from outside the basin Seal the rim with outdoor-rated sealant; replace worn caulk
Choosing a tall spray pattern in windy areas More splash loss, more wind-driven evaporation Match spray pattern to wind exposure; lower it during windy weeks
Using untreated tap water Mineral deposits accelerate algae and increase cleaning Use a basic filter cartridge or treat with dechlorinator


The cleaning frequency one is often overlooked. A fountain basin coated in algae or mineral scale has more surface area exposed to air than a smooth basin, which compounds the evaporation problem. Regular cleaning keeps both the visual quality and the water level stable.

When to Call Orange County Pond Services for Fountain Water Loss Help

DIY adjustments handle most evaporation issues, but some situations call for professional diagnosis and repair. Signs that the problem has moved beyond a weekend fix:

  • Water loss continues at the same rate after shade, cover, and spray adjustments
  • Visible cracks or wet patches around the fountain base that don’t dry out
  • Pump that runs hot, shuts off, or won’t restart
  • Older fountains where the original sealant has degraded
  • Auto-fill valve or plumbing system installation in a complex layout
  • Fountains in custom landscapes where shade or windbreaks need to fit a specific design

Orange County Pond Services has been handling fountain water-loss problems across Orange County since 2001. With more than 25 years of hands-on experience on garden fountains, wall fountains, pond-style features, and custom architectural water features, our team brings the diagnostic equipment and repair experience that get to the actual cause quickly.

Trust our specialists with the work that goes beyond a quick adjustment. Call 949-653-2305 or request a free quote online. Whether the problem turns out to be evaporation, a slow leak, or a pump issue, we’ll diagnose it and recommend the simplest path back to a fountain that holds its water.

Frequently Asked Questions

Q1. How much water should a fountain lose per day to evaporation?

A. Normal fountain water evaporation runs about 1/4 to 1/2 inch per day in mild weather, with rates climbing to 1/2 to 1 inch per day during hot weather above 85°F. Smaller basins lose proportionally more because the surface area is large relative to the total water volume. If you’re losing more than 1 inch per day in moderate weather, the cause is likely splash, wind, or a leak rather than evaporation alone. Tracking losses over a week with a simple tape mark gives a clearer picture than day-to-day readings.

Q2. Does covering a fountain at night actually save water?

A. Yes, a fountain cover used overnight reduces evaporation by 60 to 80 percent during covered hours. Even though air temperatures drop at night, water in the basin retains heat and continues evaporating, especially in summer months when basin temperatures stay above 70°F until morning. A cover blocks the air movement that drives the loss and traps the humid layer above the water. For homeowners who only run the fountain during the day, covering it the rest of the time can cut weekly refill needs in half.

Q3. What’s the right fountain placement to minimize evaporation?

A. A spot with afternoon shade, partial wind protection, and proximity to a water source for refills covers most of what matters. East-facing locations get morning sun and afternoon shade, which is ideal for the fountain and the surrounding plants. Avoid placing fountains in open lawn areas where wind has unbroken access to the basin. A spot near a wall, fence, or hedge gives natural wind protection without requiring extra structures. Plan for a nearby outdoor spigot if you’re considering an auto-fill system later.

Q4. Should I use distilled water or tap water in my fountain?

A. Tap water works fine for most fountains as long as you account for chlorine and minerals. Distilled water reduces mineral buildup and is worth using in indoor fountains or fountains with sensitive metal finishes. For typical outdoor fountains, treated tap water is more practical, especially with auto-fill systems where distilled water isn’t feasible. Adding a basic dechlorinator or using a hose-end filter handles the chlorine, and the small mineral buildup that does occur cleans off easily during regular maintenance.

Q5. How can I tell evaporation loss from a leak?

A. Run the 24-hour test. Turn the pump off, mark the water line with tape, and check the level the next day. Normal evaporation with the pump off is less than 1/4 inch in mild weather. More than that, especially in cool or overcast conditions, points to a leak. Wet soil around the fountain base, persistent water level drops to a specific line, and mineral deposits along visible cracks all confirm a leak rather than evaporation. If the test points to a leak, locate the source before the next refill so you’re not topping off into a problem that’s getting worse.