Key Takeaways
- Replace when liner age exceeds 75% of expected lifespan AND major damage occurs – EPDM at 15+ years, PVC at 5-7 years exposed, RPE at 30+ years.
- Apply the 50% cost rule – Replace rather than repair when patch costs exceed half of the new liner price.
- Multiple patches signal replacement time – More than 3 patches within 1 square meter or damage exceeding 0.5% of liner surface means systemic failure.
- Underlayment investment pays dividends – Adding $0.30-$1.00/sq ft geotextile increases liner lifespan by 30% and prevents $2,000-5,000 premature replacement.
- Material matters for longevity – RPE costs 25% more but lasts 20-40 years with 2-3x puncture resistance versus 20-30 years for EPDM or 3-10 years for exposed PVC.
A failing pond liner presents every pond owner with an expensive dilemma: patch the damage and hope it holds, or bite the bullet on full replacement? Making the wrong choice costs thousands in wasted repairs or premature replacement. Small leaks compound into ecosystem crashes, dying fish, and skyrocketing water bills. Yet replacing too early wastes a liner with years of life remaining.
The difference between a $200 patch lasting 3 years and a $2,000 replacement lasting 30 years hinges on understanding your liner’s condition, age, and damage patterns. This guide eliminates the guesswork with proven decision thresholds for pond liner replacement vs repair, material comparisons, and cost formulas developed from decades of industry experience.
Let’s explore the critical factors that determine whether your pond liner deserves another patch or needs complete replacement.
What Factors Determine Whether To Repair Or Replace Your Pond Liner?
Three critical factors drive the repair-or-replace decision: damage extent, liner age, and environmental conditions. Smart pond owners evaluate all three before spending money on temporary fixes.
What Are the Signs That Your Pond Liner Is Damaged?
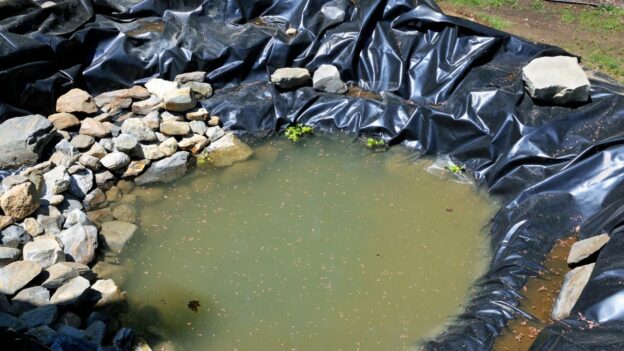
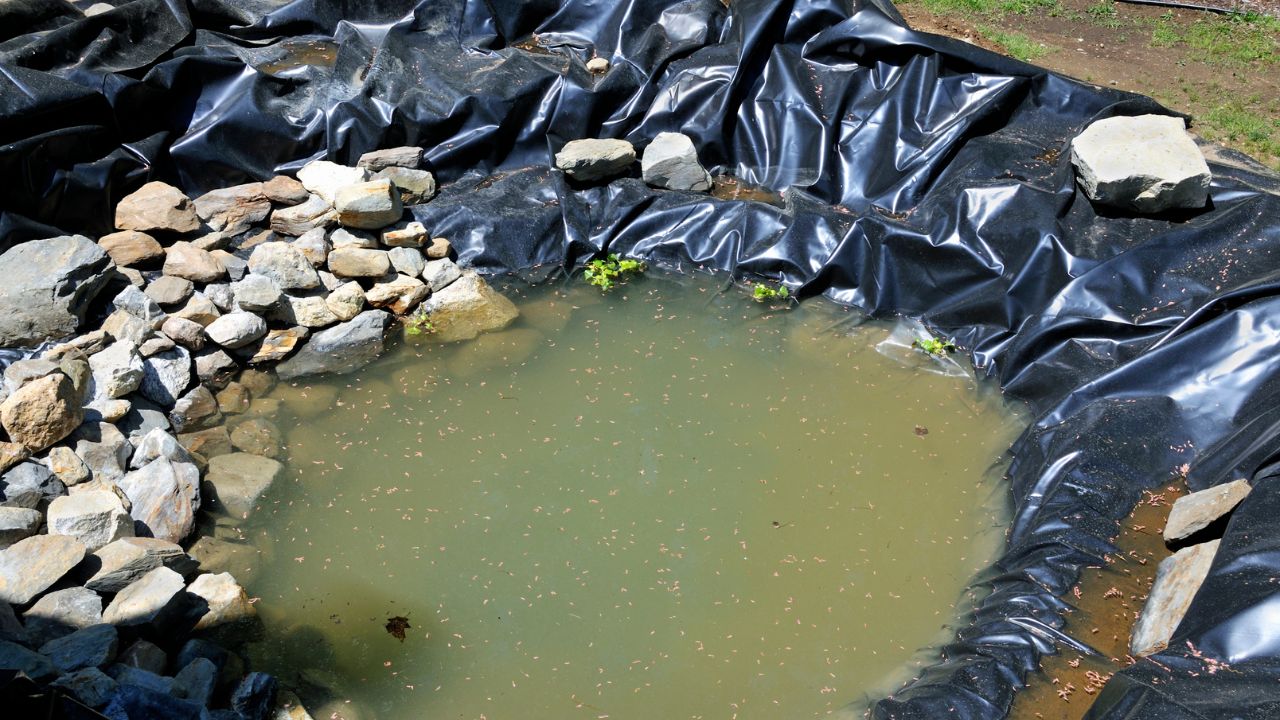
Visible damage signals immediate attention needed. Common leaking pond liner signs include:
- Punctures: Cause 10-15% liner failure rates without underlayment
- Seam delamination: Tape separation or glue failure at joints
- Animal damage: Heron beaks, dog claws, burrowing rodents create tears
- Substrate settlement: Voids greater than 1 inch stress liner material
- Surface degradation: Chalking or powdering on EPDM surfaces
- Material brittleness: Cracking when flexed indicates age failure
- UV damage: Discoloration and surface breakdown from sun exposure
Multiple damage points or seam failures typically mean it’s time to replace pond liner rather than attempt repeated patching.
How Does Age Impact The Decision To Replace Or Repair A Liner?
Liner age determines patchability. Materials lose flexibility and bonding capability over time. Understanding EPDM liner lifespan and other materials helps timing decisions.
| Material Type | Average Lifespan | Signs of Deterioration with Age |
| EPDM | 20-30+ years | Difficult to patch after 75% of lifespan (15+ years); degrades 0.5 mil/year in sunlight; cracks when flexed |
| PVC | 3-10 years exposed, 10-15 covered | Unpatchable after 5-7 years UV exposure; becomes brittle and rigid |
| RPE/HDPE | RPE: 20-40 years, HDPE: 10-50 years | HDPE loses 5-10% strength over 20 years when UV-stabilized |
How Do Pond Conditions Affect The Liner’s Condition?
Environmental factors accelerate liner degradation. Key impacts include:
- UV exposure: Reduces tensile strength 10-20% over 10 years
- Temperature extremes: EPDM stays flexible from -40°F to 175°F
- Protection matters: 20-year UV coatings help, but covering with sand/soil/stone extends life significantly
- Groundwater pressure – High water tables cause hydrostatic uplift, stressing liner attachment points
When Is It More Cost-Effective To Replace The Pond Liner Instead Of Repairing It?
Cost analysis drives smart replacement timing. Compare immediate repair expense against long-term replacement value.
Are the Repair Costs Higher Than Replacement Costs?
The 60% rule guides decisions: replace when repair exceeds 60% of replacement cost on liners past mid-life.
| Repair Action | Average Cost | Time for Repair | Expected Lifespan of Fix |
| Small patch (1-2″) | $200 materials + labor | 30-60 minutes | 2-5 years on aged liner |
| Large patch (up to 11″ x 15″) | $400 patching | 2-4 hours | 1-3 years if liner >75% through life |
| Full replacement (500 sq ft) | $625-$2,125 total ($1.25-$4.25/sq ft) | 5-7 days | 20-40 years depending on material |
What Are The Long-Term Savings Of Replacing The Liner?
Replacement eliminates recurring repair cycles. Investment in quality materials pays dividends:
- Underlayment addition ($0.30-$1.00/sq ft) extends liner life 30%
- RPE upgrade costs 25% more but delivers 2-3x puncture resistance and 20-40 year lifespan
- Eliminates patch failures – Aged liner patches fail within 1-3 years
- Stops water loss from multiple developing leaks
- Prevention math – $150-500 underlayment prevents $2,000-5,000 premature replacement
What Is The Lifespan Of Pond Liners, And How Does It Affect Replacement Vs. Repair?
Liner lifespan dictates repair viability. Materials past 75% of expected life rarely patch successfully, making replacement the smarter investment.
How Long Do Different Types Of Pond Liners Last?
Material choice determines decades of performance. Market leaders earn their position through proven longevity.
| Material Type | Expected Lifespan | Pros | Cons |
| EPDM | 20-30+ years with 20-year warranties | 45% market share; proven since 1980s; flexible | Vulnerable to punctures |
| PVC | 3-10 years exposed | Lower cost ($0.20-$0.70/sq ft); lightweight | Must be buried under 12″ soil; tears easily |
| RPE | 20-40 years | 35% market share (2024); 345-420 lbs tensile strength; 40-year warranties | 25% higher cost than HDPE |
| HDPE | 10-30 years exposed, 50-100 covered | Most recyclable (85%+ rate); excellent chemical resistance | Stiff and installation-intensive |
How Do Temperature, UV Exposure, And Pond Conditions Affect The Liner?
Environmental exposure cuts liner life dramatically. Protection multiplies longevity:
- Coverage impact – Covered HDPE lasts 50-100 years versus 10-30 years exposed
- UV damage – PVC requires 12+ inches soil coverage or degrades in 3-10 years
- Temperature tolerance – EPDM stays flexible to -40°F; PVC becomes brittle below 50°F
- Sun degradation – Exposed EPDM loses 0.5 mil thickness annually in direct sunlight
How Do You Assess the Extent Of Damage To Your Pond Liner?
Accurate damage assessment prevents wasted repair attempts. Simple tests reveal leak severity and location.
How Can You Identify Leaks Or Weak Points In The Liner?
Five proven methods locate leaks without draining the pond:
- Overnight level-drop: Turn off pump, fill pond, wait 24-48 hours to find leak level
- Bucket comparison: Weighted bucket with marked levels reveals leak versus evaporation
- Dye test: Food coloring injected near damage flows toward leak location
- Ping pong ball: Floating balls drift with current to leak spot
- Evaporation baseline: Normal: 0.25-0.5″/day; Leak: >1″/day; Major leak: >2″/day
Most leaks appear at stress points: seams, penetrations, and sharp corners.
What Types Of Damage Are Repairable, And Which Require Full Replacement?
Patch viability depends on damage type and liner age. Seam failures signal replacement time.
| Type of Damage | Repairable? | Repair Method | Comments |
| Small punctures (1-2″) | Yes | Pond sealant or 6″x6″ EPDM patch | Patch extends 2″ beyond damage |
| Large tears (up to 11″ x 15″) | Maybe | Pond liner repair kit | Holes >5″ wide suggest replacement |
| Seam separations | No | Cannot be effectively patched | Multiple seam failures require full replacement |
When Can You Temporarily Repair Your Pond Liner, And When Is Full Replacement Necessary?
Temporary repairs buy time for planned replacement. Understanding patch limitations prevents throwing money at failing liners.
What Are the Benefits Of Temporary Repairs?
Strategic patching delays major expenses without compromising pond function:
- Season extension: Patches add 1-2 seasons while budgeting for replacement
- Quick application: EPDM repair kits with 6″x6″ patches and QuickPrime adhesive fix damage fast
- Minimal downtime: 24-hour cure time before refilling gets pond running quickly
- Cost-effective threshold: Works for damage under 0.5% of total liner surface area
Temporary repairs work best on newer liners with isolated damage.
When Should You Consider Full Replacement Immediately?
Six conditions trigger immediate replacement over patching:
- Age threshold: Liner ≥75% of expected life PLUS major failure present
- Damage extent: Total damaged area exceeds 0.5% of liner surface
- Patch density: More than 3 patches within 1 square meter
- Seam failure: Major separation >12 inches cannot hold patches
- Material breakdown: Multiple seam delaminations or widespread embrittlement
- Stress point damage: Punctures at corners or penetrations won’t hold repairs
These thresholds prevent futile repair attempts on dying liners.
What Are The Risks Of Continuing To Use An Old Pond Liner?
Failing liners create cascading problems beyond water loss. Environmental and financial damage compounds daily.
How Can Undetected Leaks Affect Your Pond’s Ecosystem?
Slow leaks destabilize pond chemistry and stress aquatic life:
- Water quality collapse: Constant dilution disrupts chemical balance
- Algae blooms: Nutrient imbalance feeds unwanted growth
- Fish stress: Fluctuating parameters weaken immune systems
- Bacterial die-off: Beneficial colonies crash from instability
- Temperature swings: Fresh water additions shock cold-blooded inhabitants
Even small leaks trigger ecosystem decline over time.
Can The Use Of A Deteriorating Pond Liner Lead To Additional Costs?
Hidden expenses from failing liners exceed replacement costs quickly:
- Water waste: 2″ daily loss in major leaks drives utility bills skyward
- Chemical overuse: Constant rebalancing burns through treatments
- Pump burnout: Running dry during level drops destroys motors
- Filter strain: Increased maintenance and media replacement
- Landscape damage: Underground seepage erodes foundations and kills plants
Delaying replacement transforms manageable costs into major expenses.
How Do You Decide Step-By-Step Whether To Repair Or Replace Your Pond Liner?
Three diagnostic steps determine repair viability. Following this sequence prevents costly mistakes.
Step 1: How Do You Diagnose The Type And Extent Of Damage?
Accurate leak detection starts with systematic testing:
- Shut down equipment: Turn off all pumps and water features
- Mark water level: Fill pond to top, mark with permanent marker
- Monitor drop: Wait 24-48 hours; leak sits at lowest point where water stops
- Pinpoint location: Squeeze bottle with food coloring reveals exact leak as dye flows toward damage
- Assess severity: >2″ drop in 24 hours signals major leak needing urgent action
Step 2: How Do You Evaluate The Liner’s Age And Condition?
Five checks reveal liner health beyond visible damage:
- Surface inspection: Chalking or powdering indicates advanced degradation
- Flexibility test: Material cracking when flexed means replacement time
- Patch inventory: >3 patches in 1m² suggests systemic failure
- Age calculation: 75% of expected lifespan triggers replacement consideration
- Seam check: Tape delamination signals imminent failure
Step 3: How Do You Factor In Future Maintenance And Costs?
Smart decisions balance immediate and long-term expenses:
- Apply decision rule: IF age ≥75% expected life AND major failure THEN replace
- Cost comparison: Replace when repair exceeds 50% of new liner price
- Upgrade benefits: Underlayment adds 30% to new liner lifespan
- Hidden savings: Eliminating multiple leaks cuts water and energy costs
What Materials Are Used For Pond Liners, And How Do They Affect Your Decision To Replace Or Repair?
Material choice drives repairability and replacement timing. Each type offers distinct cost-benefit tradeoffs.
How Does The Material Type Impact Longevity And Repairs?
Material properties determine repair methods and success rates.
| Material Type | Longevity | Common Repairs | Pros | Cons |
| EPDM | 20-30+ years | Patches with primer/tape | Industry standard 45% market share; fish-safe | Moderate puncture resistance |
| PVC | 3-10 years exposed | Glued patches | Lowest cost $0.20-$0.70/sq ft | Seams fail in high temperatures |
| RPE | 20-40 years | Fusion welded | 2-3x EPDM puncture resistance (345-420 lbs tensile) | 25% cost premium |
| HDPE | 10-50 years | Hot-wedge welding at 360-400°C | 85%+ recyclable; chemical resistant | Stiff installation |
How Do Material Thickness and Manufacturing Quality Affect Replacement Decisions?
Thickness directly correlates with lifespan and repair success:
- Standard spec: 45-mil EPDM meets residential ASTM D7465 requirements
- Commercial grade: 60-mil EPDM emerging for high-traffic installations
- Budget warning: 30-mil options fail prematurely, false economy
- RPE advantage: 30-40 mil reinforced design outperforms thicker single-layer materials
- Cost-benefit: Thicker materials deliver 25-35% longer life for 50% price premium
When Is It Safe To Patch Your Pond Liner, And When Should You Replace It?
Successful patches require good material condition and proper damage location. Failed patches waste time and money.
What Types Of Damage Can Be Effectively Patched?
Isolated damage in stable liner areas patches successfully:
- Small punctures: 1-2 inch holes seal with pond sealant
- Medium tears: Damage up to 11″ x 15″ fixed with comprehensive repair kits
- Surface abrasions: Minor scrapes not penetrating full thickness
- Isolated damage: Single holes in low-stress pond areas away from edges
- Adequate margins: Patches extending 2+ inches beyond damage edges hold well
Fresh liners in their first half of expected life patch most reliably.
When Do Patches Fail And Require Full Replacement?
Five conditions predict patch failure:
- Patch crowding: Overlapping patches or multiple within 6 inches fail together
- Stress locations: Corners, penetrations, waterfall connections reject patches
- Aged EPDM: >15 years old (75% of lifespan), primer won’t penetrate properly
- UV-damaged PVC: After 5-7 years exposure, material too brittle for adhesion
- Repeat failures: Previous patches failing within 12 months signal systemic breakdown
These scenarios demand full replacement to avoid endless repair cycles.
How To Replace Your Pond Liner: Step-By-Step Guide
Systematic replacement minimizes downtime and protects pond inhabitants. Seven-day process ensures proper installation.
Step 1: How Do You Drain And Secure The Pond Before Replacing The Liner?
Wildlife protection and water conservation guide pond preparation:
- Save water: Keep 30-50% of pond water to preserve beneficial bacteria
- Fish relocation: Move to quarantine tank with pond water and aeration
- Temporary setup: Install filtration for 5-7 day minimum housing period
- Plant storage: Transfer to containers with original pond water
- Final drainage: Schedule pump-out service or rent equipment for remainder
Planning prevents stressed fish and dead plants during transition.
Step 2: How Do You Remove The Old Pond Liner Safely?
Careful removal reveals failure causes and enables material recycling:
- Document setup: Photograph all angles for installation reference
- Section cutting: Divide liner into 4’x8′ pieces for easy handling
- Failure analysis: Inspect damage patterns to prevent repeat problems
- Substrate cleaning: Remove all debris from pond bottom
- Material reuse: Repurpose for underlayment, compost covers, or garden beds
Old liner examination guides new installation improvements.
Step 3: How Do You Install The New Liner?
Proper substrate preparation and liner placement ensure 20+ year performance:
- Sharp object removal: Clear all rocks, roots, glass from substrate
- Underlayment installation: Lay 200 g/m² standard or 400 g/m² heavy-duty geotextile
- Liner conditioning: Warm in sun 30-60 minutes for flexibility
- Corner management: Create neat folds without wrinkles
- Seam overlap: Maintain 6-inch minimum for proper bonding
- Edge design: Build 18-24″ underwater shelf for marginal plants
Attention to details or calling on professional installers can prevents premature failure.
Step 4: How Do You Refill And Reestablish Pond Life?
Gradual refilling and careful monitoring confirm successful installation:
- Slow filling: Use garden hose flow rate to prevent liner shifting
- Position adjustment: Smooth wrinkles outward as water rises
- Settlement period: Wait 24 hours at 6″ below final level
- Leak testing: Check all penetrations and seams before full fill
- Level monitoring: Track daily for 7 days to confirm seal integrity
- Fish return: Float bags 20-30 minutes for temperature acclimation
What Are The Advantages And Disadvantages Of Replacing vs. Repairing A Pond Liner?
Weighing replacement benefits against disruption costs guides timing decisions. Understanding both sides prevents hasty choices.
What Are The Benefits Of Replacing Your Pond Liner?
New liner installation resets the maintenance clock for decades:
- Extended warranty: Modern RPE liners offer 20-40 year lifespans with 40-year warranties
- Superior materials: New liners provide 2-3x better puncture resistance than aged versions
- Underlayment opportunity: Adding geotextile increases lifespan 30%
- Complete leak elimination: Stops water loss from multiple failing points
- Installation corrections: Fix original substrate problems and drainage issues
What Are The Downsides To Replacing The Pond Liner?
Replacement demands significant investment and ecosystem disruption:
- Material costs: $1.25-$4.25 per square foot all-inclusive pricing
- Total expense: 500 sq ft pond runs $625-$2,125 complete
- Extended timeline: 5-7 day installation disrupts established ecosystem
- Fish stress: Temporary relocation increases mortality risk
- Biological restart: Lost beneficial bacteria requires nitrogen cycle re-establishment
What Should You Do After Replacing Your Pond Liner?
Post-replacement practices protect investment and prevent repeat failures. Proactive measures extend liner life significantly.
How Do You Prevent Future Damage To The New Pond Liner?
Five design improvements prevent common damage:
- Top protection: Geotextile overlay shields against claws and heron strikes
- Wildlife access: 3:1 slopes on one side provide escape routes
- Predator deterrent: 24″ minimum vertical walls discourage wading birds
- Edge armor: 3-6″ rounded gravel beaches prevent liner UV exposure
- Secure anchoring: 6-12″ coping stone overlap locks edges permanently
How Do You Maintain The Pond For Optimal Health Post-Replacement?
Critical first-year monitoring ensures successful installation:
- Leak detection: Mark water level daily for 7 days to catch problems early
- Water chemistry: Achieve pH 6.8-8.2, ammonia 0 ppm before fish return
- Temperature matching: Stay within ±3°F of holding tank during reintroduction
- Biological restart: Add beneficial bacteria to jumpstart nitrogen cycle
- Penetration checks: Inspect skimmers and drains monthly for first year
Should You Replace Or Repair Your Pond Liner?
Making the right choice for your pond’s future comes down to five proven decision criteria. Replace your liner when it reaches 75% of its expected lifespan and shows major failure. If repair costs exceed half the replacement price, invest in new material instead. Watch for systemic failure patterns of your liner’s surface area. When multiple patches appear, they’re telling you the liner has reached its end. Smart pond owners replace failing liners before catastrophic failure forces emergency decisions and ruins their pond ecosystem.
Need professional help for pond leak repair Orange County? Contact the experts at OC Pond Service for a thorough evaluation and honest recommendations. Schedule your consultation today.